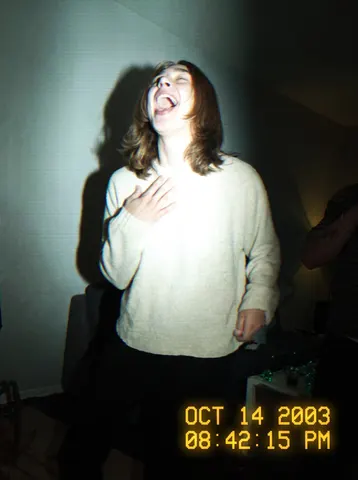
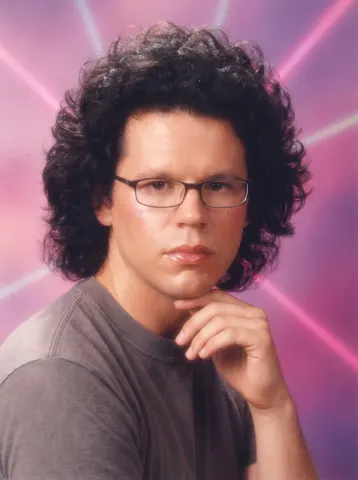
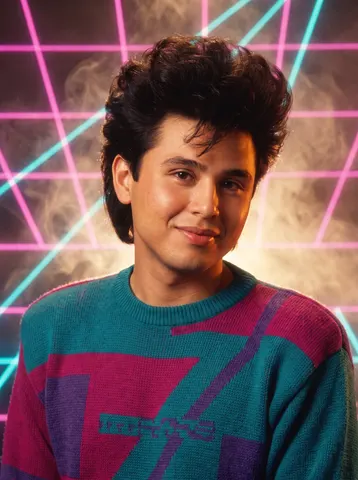
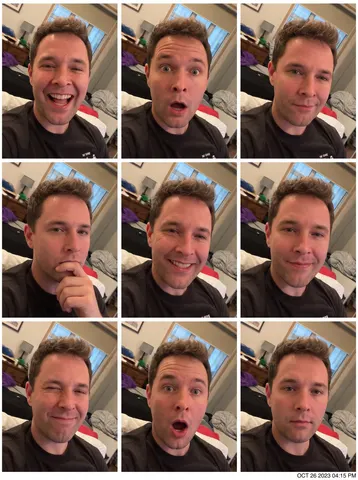
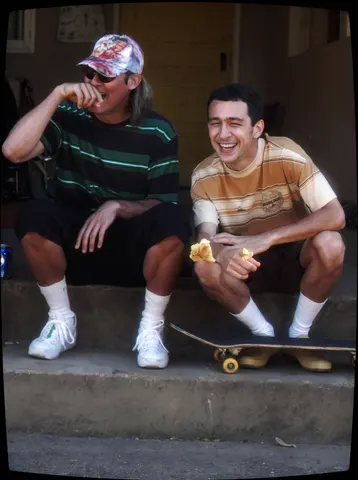
Every prompt in this pack, complete and copyable from this page. Open any one for the real before/after and the step-by-step.
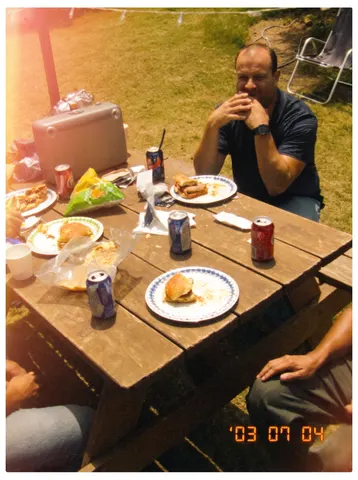
Transform this uploaded photo into a shot captured on a cheap 2003 camcorder. Overlay a glowing amber-yellow digital timestamp in the corner (date and time, thin pixelated font, slight glow bleed), and blow out the photo with a harsh on-camera flash — bright hotspot on the subject, fast falloff into a dark background, and a visible hard flash shadow behind them.

Degrade the image to match a low-resolution CCD sensor: soft blocky compression noise, slight chromatic fringing at high-contrast edges, faint horizontal interlacing lines, and mild VHS-style colour bleed where reds and blues smear at the edges. Push the white balance cool and slightly green, like an indoor fluorescent-lit room lit by camcorder flash. Keep the picture a little soft and low-fidelity — not sharp, not high-res.

Preserve the subject's identity, facial features, expression, pose, and the exact composition and framing of the original photo. Do not change what they are wearing, their surroundings, or add/remove objects. Do not smooth or retouch skin — keep texture, blemishes, and grain intact; this should look like a genuine old camcorder capture, not a modern filter.

The final result should look like a real photo pulled off an old MiniDV tape from 2003 — flash-blown, low-res, timestamped, and slightly rough around the edges.
Transform this uploaded photo into a faded 35mm film negative scan. Push the color grade into a warm amber shift, add visible film grain and scattered dust specks across the frame, and soften the overall focus slightly so it reads as an analog scan rather than a digital photo.

Add gentle light halation glowing around the brightest highlights, and let colors separate slightly at high-contrast edges, the way an aging negative naturally does. Push the effect hard enough that it reads immediately as film at a glance — this should not look like a subtle digital photo with a light filter over it.

Keep the identity, pose, composition, and framing of this photo exactly unchanged. Do not smooth the skin, do not add plastic or airbrushed texture, and do not invent new background details — preserve the real grain and texture of the original photo underneath the film treatment.

The final result should look like a real faded 35mm negative scan straight out of a photo lab, not a digital photo with an Instagram filter.
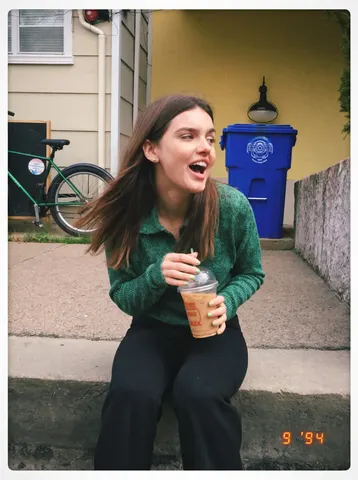
Reprocess this uploaded photo as if it were captured on a 1990s point-and-shoot film camera and printed at the drugstore. Apply a slightly washed pastel colour cast with warm-leaning skin tones, visible authentic film grain throughout the frame, and soft natural vignetting that gently darkens the corners. Keep the person's identity, pose, composition, framing, and the direction of the original lighting completely unchanged — only the color science, grain, and print treatment should shift.

Add a printed white border around the image like a drugstore film print, with a small handwritten-style orange date stamp reading "9 94" in the bottom right corner, mimicking the glowing LED date-stamp font found on real 90s point-and-shoot prints. Do not smooth or soften the skin, do not add plastic or airbrushed texture, and do not over-sharpen — preserve real skin texture and fine detail underneath the grain.

The final result should look like a genuine photo print pulled out of a shoebox from 1994 — imperfect, warm, and nostalgic, not a modern digital filter overlay.
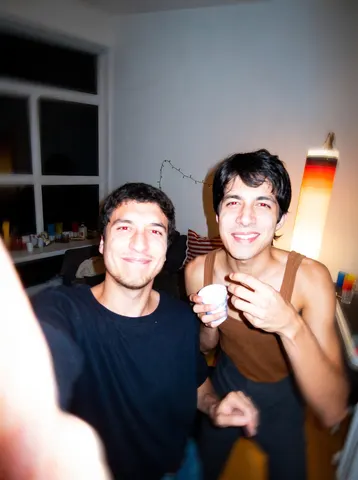
Reprocess this uploaded photo as a chaotic early-2000s party snapshot straight off a cheap digital camera. Blast it with a harsh on-camera flash — flat, direct light with a hot blown-out core on the subjects and fast falloff into darkness — and add visible red-eye on the eyes facing the camera. Introduce a touch of motion blur/smear at the edges as if the shot was snapped quickly and slightly shaky.

Compress the image the way an old 2-megapixel digital camera would: visible JPEG blocking and mosquito noise around edges, soft mushy detail in shadows, and a warm tungsten-orange color cast from indoor lightbulbs mixing with the cool flash. Keep the framing candid and slightly off-center, like it was grabbed mid-moment rather than composed.

Preserve the subjects' identities, facial features, expressions, poses, outfits, and the overall composition of the original photo exactly. Do not retouch or smooth skin, do not add or remove people or objects, and do not change the background — only apply the era-accurate camera/flash degradation described above.

The final result should look like a genuine early-2000s party photo pulled straight off someone's Myspace page — flash-blown, red-eyed, slightly blurry, and charmingly low-quality.
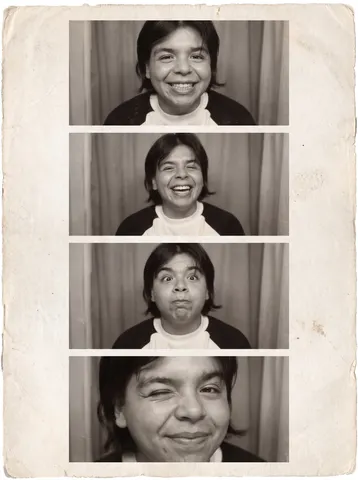
Turn this uploaded photo into a classic four-frame photobooth strip, the kind you'd get from a mall or arcade photo booth. Split the image into four vertical frames stacked top to bottom, each showing the same person caught in a different quick, candid expression — a big grin, a laugh, a silly face, a close one-eye wink — as if the shots were snapped seconds apart behind a curtain.

Keep the subject's face, identity, hairstyle, and outfit consistent across all four frames; this should read as one person captured in one sitting, not four different photos stitched together. Render the strip in a warm, slightly faded black-and-white or sepia tone with soft film grain, a thin white border separating each frame, and a worn paper-strip edge, the way real photobooth prints look after years in a wallet.

Avoid a smooth, digital, over-sharpened look — keep the grain visible and the skin texture real, and do not let the skin turn plastic or airbrushed. Do not add any text, logos, or timestamps beyond the plain strip border.

The final result should look like an actual vintage photobooth print pulled fresh from the machine — four genuine candid frames of the same person, textured, a little imperfect, and instantly recognizable as a real photobooth strip.
Recreate this uploaded photo as if it were paused on an old CRT television screen — the kind with a glass tube and visible scanlines. Lay in fine horizontal scanlines across the entire image, subtle screen curvature that gently bows the edges and corners inward like they're wrapping around a curved glass screen, and a soft RGB subpixel glow/halo around bright highlights.

Push the color grading toward a dated broadcast-TV look — slightly boosted contrast, warm-leaning midtones, gently clipped highlights, and a touch of color bleed where bright and dark areas meet. Add a faint soft blur consistent with low-resolution analog broadcast, plus light static grain, without turning the image into a blur-fest.

Keep the subject's identity, pose, composition, and framing exactly as in the original photo — do not change who or what is in frame, the setting, or the layout. Do not smooth or soften skin, do not add plastic/AI-airbrushed texture, and do not erase natural texture or grain in favor of digital noise. This should read as a real screengrab off an old television, not a modern digital filter.

The final result should look like a screengrab of this exact photo playing back on an old CRT TV — scanlines, curved-glass distortion, subpixel glow, and warm dated broadcast colors over an otherwise unchanged scene.
Transform this uploaded photo into a scanned disposable camera print, the kind you'd get back from a one-hour photo lab in the early 2000s. Push the color grade hard: a warm yellow-orange cast across the whole frame, visible film grain layered heavily through the shadows and midtones, and a soft-focus blur that's slightly stronger at the edges than the center, like a cheap plastic lens. Add an unmistakable light leak — a warm orange-pink streak bleeding in from one corner of the frame — and keep the exposure a touch inconsistent, brighter or dimmer in patches the way real film prints are.

Preserve the subject's identity, facial features, body proportions, pose, and the original composition exactly as they are — only the film texture, color grade, and print treatment should change, never the people or the scene layout. Frame the image with a thin white printed-photo border along all four edges, like a physical print pulled from an envelope, and stamp a small orange LCD-style date in the bottom corner (e.g. '03 07 04') in the blocky orange digital font disposable cameras used.

Do not smooth or soften the skin, do not add plastic or airbrushed texture — keep visible film grain and imperfect, slightly muddy shadow detail throughout. Avoid any modern HDR clarity, digital sharpness, or clean edges that would give away a modern edit; the softness and grain should be obvious, not subtle.

The final result should look unmistakably like a real disposable camera print scanned in from a photo envelope — warm, grainy, softly blurred, light-leaked, and stamped with a date, instantly recognizable as an old film photo, not a digital photo with a filter slapped on.
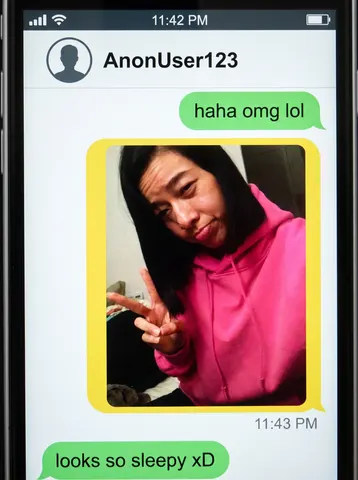
Transform this uploaded photo into a screenshot of a nostalgic mid-2010s smartphone messaging app conversation, in the style of the anonymous teen chat apps popular between 2013 and 2016. Composite the uploaded photo as a shared image inside a chat bubble in the conversation thread — keep the photo itself unedited and clearly visible inside the bubble, cropped to fit a rounded-rectangle bubble shape.

Render an authentic period smartphone status bar at the top (generic signal bars, a plain battery icon, a placeholder time like "11:42 PM") and a simple flat-design chat header bar with a plain circular avatar silhouette and a short generic anonymous username (invented, not a real name or real app name). Style the chat bubbles with the flat, rounded, brightly colored green and yellow speech-bubble look typical of that mid-2010s messenger era — one short casual text bubble above the photo bubble and one below it, generic conversational text only, plus a small timestamp beneath the image bubble.

Keep the whole screenshot looking like a real, slightly low-res phone screengrab: flat UI elements, a plain smartphone bezel edge at the very border, subtle screen glare, and mild compression artifacting consistent with a saved and re-shared screenshot. Do not use any real messaging app's actual name, logo, icon set, or exact interface design — invent a plausible but entirely generic chat UI. Do not add any other real brand names, logos, or trademarks anywhere in the frame.

The final result should look like an authentic saved screenshot from a nostalgic 2013-2016 era teen messaging app conversation.
Transform this uploaded photo into an extremely harsh, unmistakable front-camera flash selfie from a 2014 iPhone 6. This must look dramatically different from a normal photo: fire a blinding direct LED flash straight at the face that blows out the skin to near-white on the forehead, nose bridge, and cheekbones, crushing detail there completely. The eyes should show a small red-eye tint. Render a hard, sharply-defined black shadow silhouette cast on the wall directly behind and to the side of the subject, exactly like a point-source flash a few inches from the lens. Make the background around the subject go noticeably darker and underexposed compared to the blown-out face, since a weak on-camera flash only lights what's close to it. Lower the overall image resolution and sharpness to look like a soft, low-megapixel 2014 front camera sensor with visible high-ISO grain and noise in the shadow areas. Shift the white balance slightly cool and flat.

Preserve the subject's exact facial identity, expression, pose, hairstyle, and clothing — only change the camera, flash, and sensor rendering. Do not add any modern text, watermark, logo, or brand mark anywhere in the frame.

The final result should look like an unmistakably harsh, blown-out, slightly unflattering flash selfie pulled straight from a 2014 iPhone 6 camera roll — not a normal well-lit photo.
Turn this uploaded photo into a 3x3 photobooth-style expression grid featuring the same person across nine panels, each showing a distinct genuine expression (big laugh, surprised, smirking, contemplative, wide grin, soft closed-mouth smile, playful wink, shocked open-mouth, relaxed neutral). Keep every panel using the exact same outfit, hairstyle, lighting setup, and camera framing as a continuous strip, as if shot in one quick booth session.

Preserve this person's identity, facial structure, and skin texture exactly across every panel — do not smooth, reshape, or beautify the face differently between panels. Keep natural skin texture and grain consistent panel to panel; avoid plastic skin, warping, blending errors between grid cells, or asymmetrical panel sizing. Do not include any real logos, brand marks, or trademarked design elements anywhere in the frame or booth signage.

Arrange the panels in a clean even grid with thin white dividing lines like an analog photobooth strip, with a small printed timestamp in the corner styled like a photo booth receipt. The final result should look like an authentic photobooth strip capturing one person's genuine range of expressions in a single sitting.
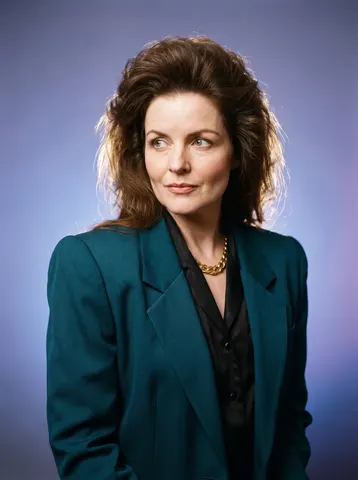
Transform this uploaded photo into an 80s power-dressing portrait. Keep the person's exact facial features, identity, and expression as shown in the original photo — do not change their face shape, skin tone, or age.

Dress the subject in a bold 1980s power suit with dramatically exaggerated shoulder pads, a structured blazer in a rich jewel tone or bold pattern, and big teased or voluminous 80s-style hair. Pose them against a studio backdrop with dramatic side lighting and a soft gradient background, in the style of a glossy 80s corporate glamour headshot. Do not include any real logos, brand names, or copyrighted graphics anywhere in the image.

Preserve natural skin texture and hair detail — no smoothing, no plastic or waxy skin, no melted or warped fabric on the shoulder pads. Keep photographic grain and realistic studio lighting so the image reads as an authentic vintage photograph, not an illustration or 3D render.

The final result should look like an authentic 1980s power-suit glamour portrait of this exact person, dramatically lit, boldly tailored, and completely free of any real-world branding.
Transform this uploaded photo into a classic 2016-era VSCO square photo, presented as a printed photo card. Crop the visible photograph itself into a clean square, and mount it with a thick, even white border/mat on all sides so the whole card fills the frame, with slightly more white space at the bottom like a printed VSCO export.

Apply a washed-out VSCO-style fade to the square photo: lift the blacks slightly, desaturate warm tones just a touch, and add a soft, cool-leaning color grade reminiscent of the A6 or HB2 filter era — muted greens, faded skin tones, and a gentle matte contrast curve.

Preserve the subject's identity, pose, and composition from the original photo exactly — only the color grade, square crop, and white mat border should change. Do not smooth or plasticize the skin, keep natural texture and a light film-like grain, and don't add any real app UI, logos, or watermark text anywhere in the image. Remove or blur any illegible text or graphic on clothing so nothing reads as a logo or brand mark.

The final result should look like an authentic 2016 VSCO square export mounted as a printed photo card, faded and nostalgic, with the thick white border framing an unmistakably real photo.
Transform this uploaded photo into a classic 1980s laser-grid studio portrait. Place the subject in front of a glowing neon laser-grid backdrop with magenta and cyan beams crossing diagonally, with a soft smoky haze catching the light. Style the hair big and teased with extra volume, and dress the subject in a bold shoulder-padded blazer or graphic sweater in saturated 80s colors. Add warm studio portrait lighting with a soft glow, classic mall-photo-studio framing, cropped closely at the shoulders.

Preserve the subject's exact face, identity, bone structure, and skin tone from the original photo — do not reshape or idealize the face. Keep the original head angle and expression intact; only the hairstyle volume, wardrobe, lighting, and background should change. Maintain natural skin texture; do not smooth skin into plastic or airbrushed CGI, and keep the print grain of a genuine photo-lab print.

Do not add any real brand names, logos, or readable text anywhere in the image — the laser grid and backdrop must be entirely generic light effects with no trademarked studio branding, and any clothing must be plain with no logos or text. Avoid warping the face or hair into unnatural shapes, and keep proportions anatomically correct.

The final result should look like a genuine 1980s mall photo studio portrait, printed with warm color grading and soft grain.
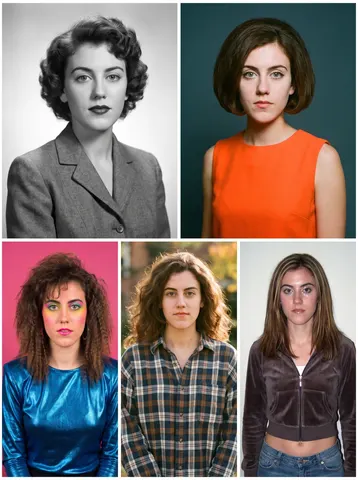
Turn this uploaded photo into a five-panel decade grid, showing the same face reimagined once per era: a 1950s classic studio look, a 1960s mod portrait, a 1980s bold-color portrait, a 1990s casual snapshot, and a 2000s digital-camera-flash portrait, arranged in a clean grid layout with thin white borders between panels.

Preserve the subject's identity, facial structure, and proportions in every single panel — the face must be instantly recognizable as the same person across all five eras, with only hairstyle, clothing, color grading, and photographic style changing to match each decade.

Keep skin looking natural and photographic in every panel — no smoothing, no plastic texture, no over-sharpening — and let each era's panel carry authentic period texture (film grain for the older decades, digital flash artifacts for the 2000s panel) without ever obscuring the face. No real logos, brand names, or trademarked material should appear in any panel.

The final result should look like a nostalgic decade-by-decade portrait grid, five believable, distinct eras of the same person's life, seamlessly gridded together.
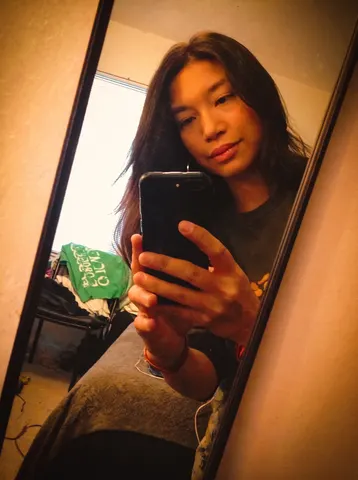
Transform this uploaded photo into a classic 90s mall glamour-shot studio portrait. This is NOT a mirror selfie anymore — completely remove the phone and the hand holding it from the image, and recompose the pose as if a professional studio photographer took the shot: the subject facing the camera directly, shoulders turned slightly, one or both hands relaxed near the chin or face in a flattering glamour-portrait pose, no device or hand-held object anywhere in frame.

Replace the background with a dreamy pastel-to-magenta gradient studio backdrop with soft glowing laser-beam streaks, add soft diffused studio lighting with a gentle glowing haze over the whole image, and style the hair noticeably bigger, fuller, and more feathered, era-appropriate for a late-80s/90s glamour photo session.

Keep the subject's identity fully recognizable — same face shape, features, and expression energy, just glammed up for the studio. Add a touch of glossy makeup and soft glamour lighting on the face.

Avoid plastic, over-smoothed skin or a modern sharp digital look — the whole image should have a soft-focus, slightly hazy glow like a real photo-studio print from that era, a little cheesy, never airbrushed flat or sharp.

The final result should look like an actual 90s mall photo-studio glamour portrait print — dreamy, soft-focus, a little over-the-top, but unmistakably them, with zero trace of a phone or mirror selfie.
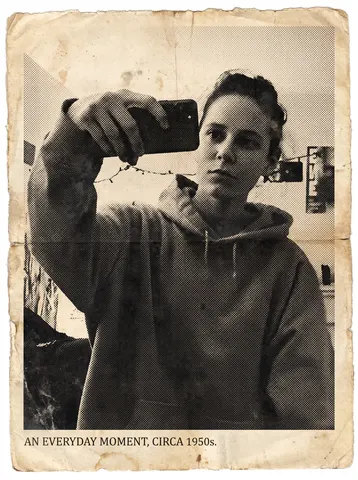
Turn this uploaded photo into a vintage newspaper clipping, like it was torn from a decades-old print edition. Convert the image to a grainy black-and-white halftone print — visible dot pattern, slightly uneven ink coverage, a bit of ghosting/registration blur — and set it inside a clipping with a rough torn paper edge, aged yellowed paper tone, and a small serif caption line beneath it.

Keep the person's identity, pose, expression, and the composition of the original photo completely unchanged — only the print process and paper are new. Do not smooth or beautify the face; keep real skin texture, real hair strands, and natural asymmetry intact under the halftone dots.

Avoid modern-looking sharpness, color bleed, plastic skin, or an obviously digital filter look. The halftone dots and paper grain should feel physically printed, not like a preset overlay, and the torn edge should look hand-torn, not vector-perfect.

The final result should look like a real clipping salvaged from an old newspaper archive — grainy, aged, slightly imperfect, like someone could have actually cut it out decades ago.
Transform this uploaded photo into a classic 90s/2000s school yearbook portrait. Replace the background with a cheesy studio laser backdrop (choose a classic pattern: blue laser beams, marbled clouds, or a starburst gradient) and add the soft, slightly overexposed studio flash lighting typical of mall portrait studios from that era.

Preserve the person's face, identity, expression, hairstyle, and clothing from this uploaded photo exactly as they are — do not reshape features, change the hairstyle, or swap outfits. Keep the pose and framing close to a classic head-and-shoulders yearbook crop, adjusting only as needed to match the format.

Do not smooth or airbrush the skin into a plastic finish — keep real skin texture, and add only the mild softness and slight color cast typical of period film photo studio prints, along with a touch of natural grain. Avoid modern digital sharpness or any obviously AI-generated background artifacts.

The final result should look like an authentic school photo day portrait pulled straight out of a 90s or 2000s yearbook.
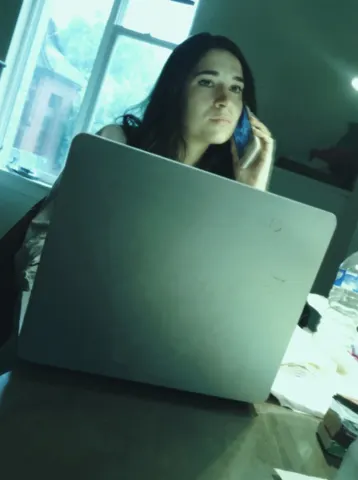
Transform this uploaded photo into an early-2010s built-in laptop webcam capture. Drop the effective resolution so fine detail softens into gentle blur, and introduce mild motion smear on any moving edges, as if the sensor is struggling to keep up with a live feed.

Push the white balance into a slight greenish-cyan cast typical of cheap laptop webcam sensors, and flatten the lighting to a single flat source coming from the screen in front of the subject, killing shadow depth and warmth. Add faint compression blockiness in low-detail areas like walls or shirts, plus a light scanline flicker across the frame, without covering or distorting the subject's face.

Keep the person's identity, facial features, pose, and the framing and composition of the original photo unchanged — this is a capture-quality downgrade, not a new photo. Do not add any interface elements: no browser chrome, no app windows, no buttons, no on-screen text, no call overlays, no logos. Keep the image looking like a real degraded photo, not a screenshot of software.

The final result should look like a low-quality snapshot pulled straight from an old laptop's built-in webcam — soft, greenish, faintly smeared and blocky, but still clearly the same person in the same room.
Transform this uploaded photo into a scanned dorm-room Polaroid print. Crop the frame to a square composition and add a thick white polaroid border, slightly thicker at the bottom. Push the exposure down slightly across the center of the image and shift the color balance warm, like an old Polaroid emulsion that's been aging in a shoebox.

Keep the subject's identity, facial features, pose, and the overall composition and lighting direction completely unchanged — this is a print treatment, not a re-render of the scene. Soften the focus gently toward the edges of the frame while keeping the center reasonably sharp, and add a faint fingerprint smudge on the white border like it's been handled by hand.

Do not smooth or plastify the skin, and do not add fake film grain that looks digital — keep any texture believable, like a real photo print that's been scanned on a flatbed scanner. Avoid oversaturating colors or adding a heavy vignette; the look should feel like an actual aged Polaroid, not a filter preset.

The final result should look like a genuine dorm-room Polaroid snapshot pulled from a shoebox of old photos — square, warm, slightly soft, with a handled white border.
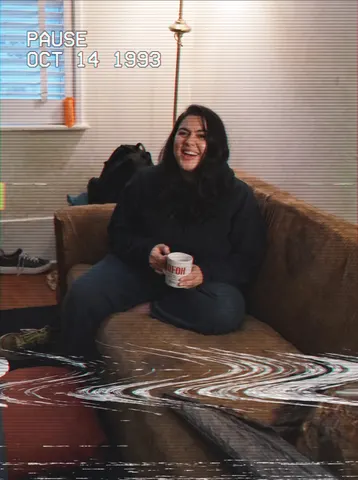
Transform this uploaded photo into a paused VHS tape frame, as if someone hit pause on an old camcorder recording. Lay in tight horizontal scan lines across the entire frame, soft chromatic aberration that fringes red and cyan at high-contrast edges, and a band of tracking distortion that warps and streaks near the top or bottom of the frame like the tape is glitching mid-pause.

Pull the color palette down into a muted, slightly washed-out VHS grade — lower saturation, lifted blacks, a faint magenta-green color cast, and soft edge blur consistent with analog video resolution. Add a subtle timestamp-style flicker and light noise/static grain across the image, plus faint horizontal color bleed at strong edges.

Keep the subject's identity, pose, composition, and framing exactly as in the original photo — do not change who is in the frame, what they are doing, or the background layout. Do not smooth or soften skin, do not add plastic/AI-airbrushed texture, and do not remove the natural grain or replace it with digital noise. This should look like a real paused VHS frame, not a clean digital filter.

The final result should look like someone froze an old camcorder tape mid-playback of this exact photo — scan lines, tracking glitch, and a washed-out analog color grade over an otherwise unchanged scene.
Transform this uploaded photo into a strongly stylized 2016-era phone snapshot straight out of an early Instagram feed, like it was run through an old built-in filter (think Valencia/X-Pro II style presets). Push the color grade hard: warm amber-orange cast overall, noticeably lifted and faded blacks, punchy oversaturated warm tones, and a heavy soft vignette darkening all four corners so the center of the frame glows brighter than the edges.

Preserve the subject's identity, facial features, body proportions, pose, and the original composition and lighting direction exactly as they are — only the color grade, contrast curve, and surface texture should shift, never the person or the scene layout. Add a visible low-res front-camera softness across the whole image, like it was shot on an early smartphone sensor, plus a faint square-crop-era feel even within the 3:4 frame.

Do not smooth or soften the skin, do not add plastic or airbrushed texture. Instead layer in obvious visible grain and mild chromatic noise across shadows and midtones — the imperfection is the whole point and should be immediately noticeable, not subtle. Avoid any modern HDR clarity, crisp sharp edges, or clean digital look that would give away a modern edit.

The final result should look unmistakably like a real photo pulled straight from a 2016 Instagram archive — heavily filtered, warm and faded, grainy, vignetted, and obviously nostalgic at a glance, not a subtle tweak of a modern photo.