Every concept prompt in the library, complete and copyable from this page. Open any prompt page for the real before/after and step-by-step.
Remove the digital date/time stamp burned into this uploaded photo. Locate the orange or yellow LCD-style numbers stamped in the corner — typically a date, time, or frame counter left by an old point-and-shoot or disposable camera — and reconstruct the image underneath them as if the stamp were never there.

Preserve the identity of every person, the exact composition, framing, and lighting of the original photo. Do not shift, crop, or re-light the scene — only rebuild the small patch of image where the stamp sat, matching the surrounding grain, color, and texture exactly.

Keep the photo's natural film or sensor grain, mild noise, and true-to-life color balance. Do not smooth or soften skin, do not add plastic-looking texture, and do not introduce new artifacts, blur, or warping anywhere else in the frame.

The final result should look like the original photo was never stamped at all — a clean, natural shot with no visible trace of the date/time overlay.
Look closely at this uploaded photo and locate any watermark, logo stamp, username handle, or semi-transparent app overlay printed across the image. Digitally remove every layer of that watermark completely, rebuilding the covered pixels underneath so the photo reads as a clean original capture with nothing printed on top.

Keep the subject, composition, framing, and lighting of the photo exactly as they are — do not recrop, do not shift objects, do not change colors or exposure beyond what is needed to erase the overlay. Reconstruct any texture, food, fabric, or background detail that was hidden behind the watermark so it blends seamlessly with the surrounding pixels.

Avoid smoothing or plastic-looking patches where the watermark used to sit — preserve the natural grain, texture, and mild noise of the original photo so the fix is invisible. No new blur, no warped edges, no leftover ghosting or faint text outlines.

The final result should look like the photo was never watermarked at all — just a clean, ordinary phone photo you could have taken yourself.
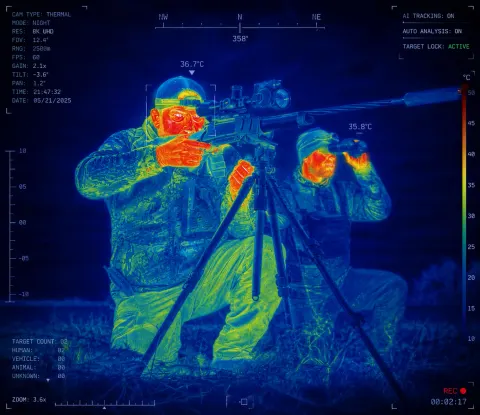
Transform the uploaded image into a highly realistic AI thermal vision surveillance scan while preserving the exact identity, facial features, body proportions, pose, clothing, background, lighting direction, and camera perspective of the original photo. Convert the entire scene into a futuristic military-grade infrared thermal imaging view as if captured through an advanced thermal camera. Render the subjects with realistic heat signatures, using a scientific thermal color spectrum where cooler areas appear deep blue and cyan, medium temperatures appear green and yellow, and warmer areas such as faces, hands, and exposed skin transition into orange, red, and white highlights. Maintain the original clothing shapes and textures but reinterpret them through thermal material detection, showing realistic heat absorption and temperature differences across fabrics. Add subtle AI computer vision analysis elements including face recognition brackets, body tracking markers, temperature readings, thermal scale indicators, digital sensor overlays, scanning lines, grid patterns, small technical HUD text, and futuristic surveillance interface details integrated naturally into the image. The result should look like an authentic screenshot from a next-generation military reconnaissance camera or AI-powered security system, with ultra-detailed infrared rendering, realistic heat distribution, sharp edges, high contrast, subtle sensor noise, infrared bloom, professional VFX quality, 8K detail, and believable thermal camera artifacts. Keep the original composition and framing unchanged, make it photorealistic and technologically advanced, not cartoonish, not fantasy, not stylized.
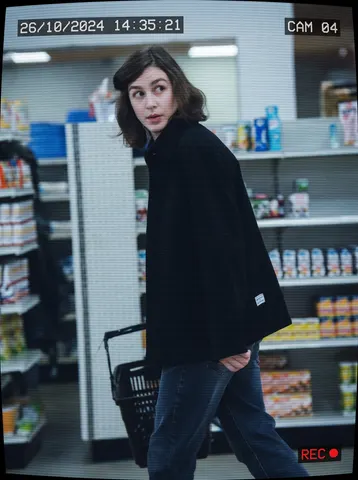
Transform this uploaded photo into a candid CCTV security-camera still. Apply a cool, slightly desaturated surveillance color grade, subtle horizontal scanlines, and a mild fisheye-style lens curvature at the edges of the frame, as if captured from an overhead security camera.

Add authentic graphic overlay chrome in the corners: a small burned-in timestamp (date and time) in the top-left corner, a camera ID label like "CAM 04" in the top-right corner, and a thin red "REC" indicator with a small dot in a corner, all rendered in a blocky monospace font typical of real CCTV systems.

Preserve the subject's identity, pose, and framing from the original photo, keeping the composition readable as a genuine security-camera capture rather than a staged photo. Do not add soft film grain, light leaks, or blur — keep the image graphically sharp so the CCTV overlay elements stay crisp and legible at thumbnail size. No real brand names, camera manufacturer logos, product packaging text, or trademarked UI elements should appear anywhere in the overlay or background.

The final result should look like an authentic pulled CCTV security still, timestamped and labeled, unmistakably surveillance footage of a real moment.
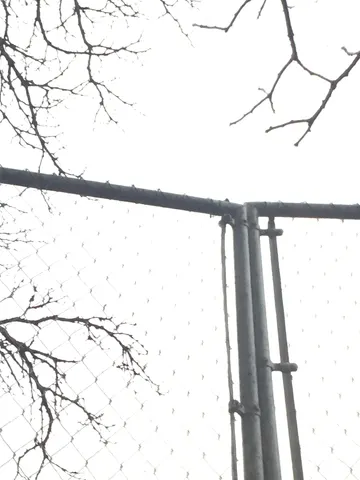
Remove the chromatic aberration from this uploaded photo. Along every high-contrast edge — where a dark branch, railing, or rooftop line meets a bright sky, or where backlit hair meets a bright background — eliminate the fringes of purple, magenta, and green color bleeding just outside the edge. Pull those color halos back into the correct, true color of the object and the background behind it.

Keep the composition, framing, and lighting of the photo exactly as they are. Do not recolor, recrop, or straighten anything, and do not change the identity of any person, the position of any object, or the overall exposure. Only correct the fringing artifact itself.

Preserve the photo's natural grain and texture — do not smooth skin, do not apply plastic-looking denoising, and do not blur the edges to hide the fix. The corrected edges should still look crisp and photographic, just without the rainbow-colored bleeding.

The final result should look like a photo taken with a well-corrected, high-quality lens — every edge naturally sharp and true to color, as if the fringing was never there.
Recompose this uploaded photo into a third-person open-world video game screenshot, as if captured mid-gameplay from an over-the-shoulder chase camera positioned just behind and above the subject's shoulder.

Render the scene with photoreal game-engine lighting: subtly heightened contrast, slight bloom on bright highlights, faint chromatic edges, and light directional motion blur trailing off the subject's back foot and swinging arm to suggest forward movement. Add a minimal HUD overlay: a small circular minimap in the top-left corner with a simple direction blip, a slim health/stamina bar beneath it, and the curved edge of a weapon/item wheel just visible fading in at the frame's bottom-right corner. Keep all HUD elements simple placeholder shapes with no readable text, brand names, or logos.

Preserve the subject's identity, body proportions, hairstyle, clothing, and pose exactly as in the source photo — this is a re-render of the same person on the same street, not a new scene or a different person. Keep the same camera framing, distance, time of day, and lighting direction, only reinterpreted with engine-render textures. Avoid plastic or waxy skin, avoid warped hands or feet, and keep fabric and skin texture with natural grain intact.

The final result should look like a real paused screenshot from a next-gen open-world crime game — same person, same street, now rendered in-engine with HUD elements and cinematic motion blur.
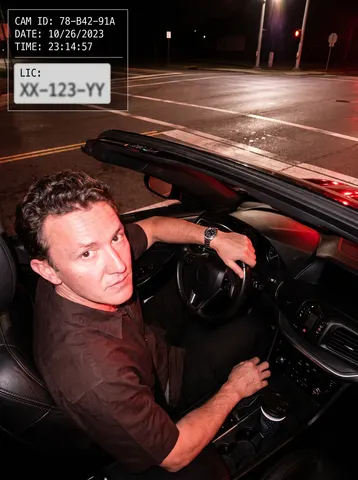
Transform this uploaded photo into a red-light traffic camera capture. Keep the person's identity, face, and outfit exactly as shown in the original photo — do not change their features, clothing, or pose. Remove any phone, phone mount, or personal device from view; show only the driver and the car interior.

Render the scene as if captured mid-flash by a red-light or speed camera mounted above an intersection: add a harsh white flash-lit look with slightly blown highlights and a raised, wide-angle downward camera angle looking through the windshield toward the subject. Overlay a graphic HUD readout in one corner with a simulated date/time stamp, a fake camera ID code, and a blurred-out generic license-plate style rectangle — invent all numbers and text, no real plate numbers, and no real car brand logos, badges, or emblems anywhere on the vehicle or dashboard.

Keep the background context recognizable as a street or intersection setting, with realistic asphalt, road markings, and ambient night lighting. Do not add soft film grain, light leaks, or blur — the imperfection here comes only from the flash exposure and the graphic HUD overlay, not from texture effects. No smoothing or plastic skin; preserve real skin and fabric texture under the flash lighting.

The final result should look like an authentic red-light traffic camera still of this exact person's driving moment, complete with a graphic HUD overlay, harsh flash lighting, and zero real-world branding.
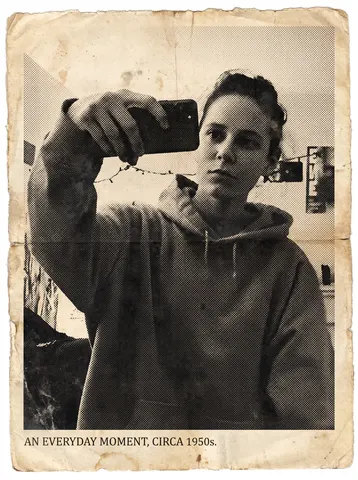
Turn this uploaded photo into a vintage newspaper clipping, like it was torn from a decades-old print edition. Convert the image to a grainy black-and-white halftone print — visible dot pattern, slightly uneven ink coverage, a bit of ghosting/registration blur — and set it inside a clipping with a rough torn paper edge, aged yellowed paper tone, and a small serif caption line beneath it.

Keep the person's identity, pose, expression, and the composition of the original photo completely unchanged — only the print process and paper are new. Do not smooth or beautify the face; keep real skin texture, real hair strands, and natural asymmetry intact under the halftone dots.

Avoid modern-looking sharpness, color bleed, plastic skin, or an obviously digital filter look. The halftone dots and paper grain should feel physically printed, not like a preset overlay, and the torn edge should look hand-torn, not vector-perfect.

The final result should look like a real clipping salvaged from an old newspaper archive — grainy, aged, slightly imperfect, like someone could have actually cut it out decades ago.
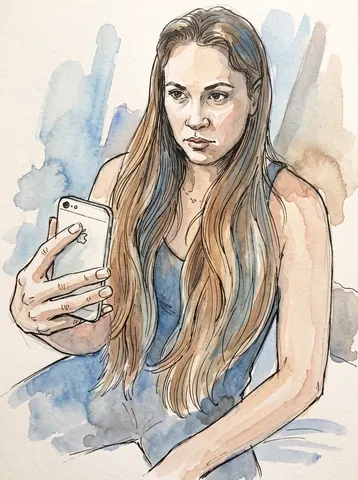
Transform this uploaded photo into a loose ink-and-watercolor sketch portrait. Redraw the subject with visible hand-inked linework and soft, bleeding watercolor washes that pool and feather slightly at the edges, like a page pulled straight from an artist's travel sketchbook.

Preserve the subject's identity, facial features, pose, and expression exactly as photographed, and keep the original composition and framing unchanged. Let the background simplify into loose washes of color and suggested shapes rather than a literal rendering, but keep it recognizable as the same setting.

Keep the linework imperfect and human — visible pencil guides, slightly uneven ink lines, and visible paper grain and texture. Do not smooth the result into a clean digital illustration or add glossy shading; avoid plastic skin, symmetrical over-polish, or anime-style enlarged eyes.

The final result should look like a real watercolor-and-ink sketch someone painted by hand from this exact photo.
Remove the dark, out-of-focus smudge blocking part of this uploaded photo — the classic accidental finger-over-the-lens blur that ruins an otherwise good shot. Reconstruct whatever was hidden behind that blurry patch so the corner or edge looks like it was never covered in the first place.

Keep everything else in the photo exactly as it is: the same composition, framing, colors, and lighting throughout the rest of the frame. Don't add, remove, or rearrange any other object, and don't crop or zoom the shot to hide the fix — just clear the obstruction and fill in what was behind it naturally.

Match the reconstructed area to the surrounding light, focus, and grain so the seam is invisible — no smudging, no plastic smoothing, no obvious AI patchwork, and keep the same mild everyday photo noise and texture as the rest of the image.

The final result should look like a normal, perfectly framed photo with no visible obstruction at all — as if the shot was clean from the moment it was taken.
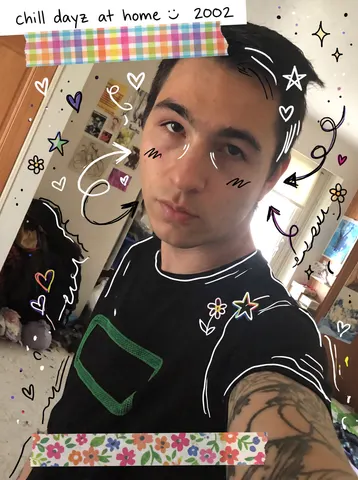
Add a hand-drawn doodle diary overlay to this uploaded photo, like a page torn from a Y2K scrapbook journal. Scatter playful hand-drawn doodles around the subject — little hearts, stars, swirly arrows, a squiggly underline, tiny flowers — in white or colored marker/pen style, plus one or two strips of washi tape and a short handwritten caption in the corner, as if someone decorated a printed photo by hand.

Keep the photo underneath completely untouched: the person's identity, face, expression, pose, outfit, the background, the composition, and the lighting must stay exactly as they are in the original. The doodles and tape sit on top of the photo like an overlay, they do not replace or repaint any part of the real image.

Avoid making the doodles look like a digital font or a heavy filter — they should look like genuine handwriting and hand-drawn ink lines, slightly uneven and imperfect, with the tape looking like real paper with a bit of texture and a soft shadow. Keep the photo's own grain and natural imperfections untouched underneath the doodles.

The final result should look like a real printed photo that a friend decorated by hand with pens, stickers, and washi tape for a scrapbook page.
Transform this uploaded photo into a dreamy double-exposure portrait by blending the subject with a second, softly layered image — drifting flowers, city lights, forest silhouettes, or a starry sky — merged seamlessly into the same frame. Let the two exposures interweave through the hair, shoulders, and negative space so the second scene feels like it's emerging from within the subject.

Preserve the subject's identity, facial features, pose, and framing exactly as they are — the blend should reveal a second world layered on top, not replace or distort who is in the photo. Keep the original lighting direction and mood as the anchor tone beneath the overlay.

Keep the blended texture painterly and analog, like true double-exposed film — avoid muddy overexposed washouts, plastic skin, or heavy-handed clipping that erases detail. Grain and soft light leaks are welcome; garbled edges and warping are not.

The final result should look like a single frame of hand-shot double-exposure film, two worlds captured in one exposure.
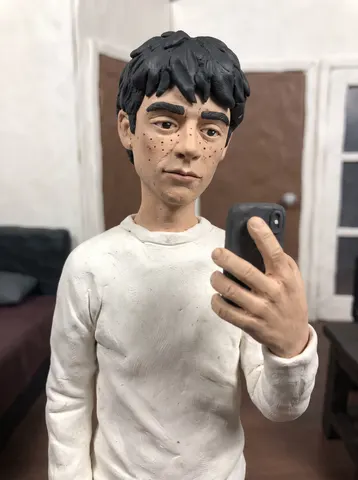
Transform this uploaded photo into a claymation stop-motion character, as if pulled straight from a handcrafted animated film. Rebuild the subject's head, hair, and clothing out of matte, slightly textured modeling clay, keeping visible fingerprint dimples, subtle seams, and small tool marks exactly where a real animator's hands would leave them.

Preserve the subject's identity, facial proportions, expression, pose, and the overall composition of the original photo — this should read as the same person sculpted in clay, not a different character. Keep the background staged like a miniature tabletop set that echoes the original setting, with soft practical studio lighting instead of the original photo's lighting.

Do not render smooth CGI-plastic skin or a glossy 3D-render look — the clay must feel physically sculpted, with matte surfaces, tiny thumbprint textures, and slightly uneven forms the way real stop-motion puppets look on camera. Avoid warping the face into caricature; keep it recognizably the same person, just built from clay.

The final result should look like a single frame pulled from a beloved stop-motion animated film, starring this exact person as a handcrafted clay puppet.
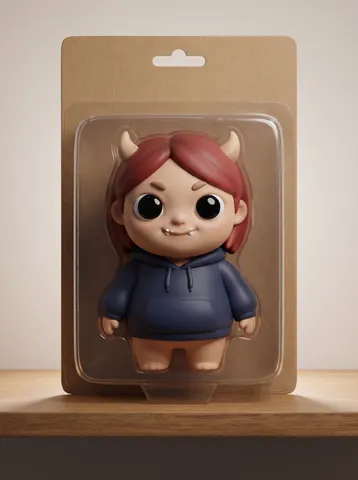
Transform this uploaded photo into an ugly-cute vinyl monster collectible toy, still sealed in its retail blister packaging. Reimagine the subject's likeness as a mischievous vinyl monster figure: big round glossy eyes, a small impish grin with tiny rounded teeth, softly oversized ears or a couple of stubby horn nubs, chunky rounded proportions, molded in a solid matte vinyl finish with visible mold seam lines like a real collectible. Package the figure in a cardboard-backed blister display box with a plain solid-color header card and a clear plastic bubble showing the figure, styled like a designer toy photographed on a store shelf.

Preserve the subject's original hairstyle, hair color, and identifying features translated into toy form so the figure is still clearly recognizable as based on the original photo. Keep the composition centered and well-lit like a product photograph, with soft studio lighting and a slight shadow beneath the packaging.

Do not include any real brand names, logos, character names, or any readable text on the packaging or figure — the header card must be completely plain and generic, with no trademarked wording or symbols anywhere. This is not a mirror selfie anymore; remove any phone or hand holding a device entirely, and show a clean product-photography composition. Avoid melted or warped plastic textures; keep the vinyl surface matte and slightly imperfect, not glassy overly-glossy CGI.

The final result should look like a genuine photo of a quirky designer vinyl monster toy still sealed in its retail blister packaging.
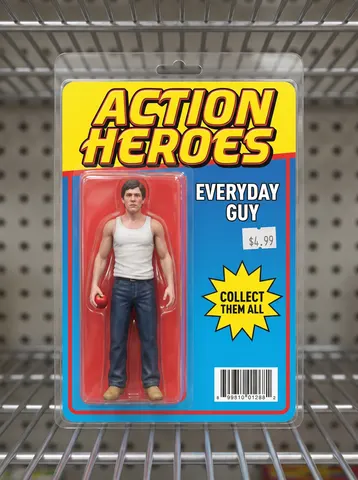
Turn this uploaded photo into a miniature collectible action-figure version of this person, packaged on a colorful blister card as if found in a discount grocery store toy aisle. This is not a mirror selfie or a phone photo anymore — remove any phone, hand, or camera device entirely and replace the whole scene with a close-up product-photography shot of ONLY this single sealed toy package, isolated against a plain blurred neutral shelf background with NO other toy packages, boxes, or characters visible anywhere in frame, foreground or background. Show the figure standing in a molded clear-plastic tray insert, dressed in the same everyday outfit as the photo, holding a plain unbranded red apple as its accessory (no can, no beverage, no printed text on the accessory at all).

The cardboard header card behind the figure features bold retro toy-packaging typography reading generic hero-brand text, bright solid colors, and a plain generic barcode. Absolutely no real brand names, franchise names, movie or comic logos, trademarked characters, or any other recognizable toy line anywhere in the image — the background must be an out-of-focus plain metal shelf with nothing legible on it.

Preserve this person's face, exact likeness, proportions, and identity in miniature figure form — do not distort or morph the face into a caricature. Keep sculpted-plastic texture believable with visible seams and a matte toy finish, avoid melted or warped plastic, no blurring of the figure itself, no extra limbs.

Add a small starburst graphic reading "Collect Them All" and a plain generic price sticker. The final result should look like an authentic collectible action figure spotted alone on a real grocery store toy aisle shelf, with the shelf background deliberately empty and out of focus.
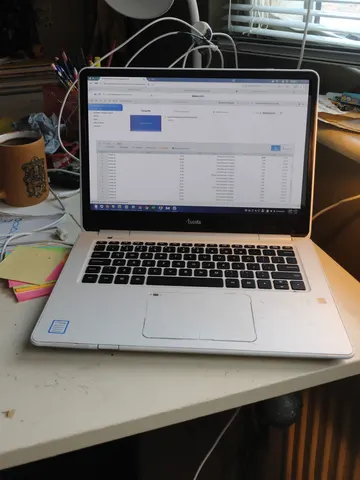
Remove the harsh glare and reflection washing out this uploaded photo's laptop or monitor screen. Reconstruct the obscured screen content — text, images, or interface — so it reads clearly and naturally, matching the screen's original brightness and color balance.

Keep the subject, room, desk setup, and lighting outside the screen completely untouched — only correct the glare on the display itself. Do not change the composition, add or remove objects, or alter anything beyond the screen surface.

Preserve natural photographic texture: no smoothing, no plastic-looking surfaces, keep existing grain and detail intact. Avoid an unnaturally flat or fake-looking screen glow when correcting the reflection.

The final result should look like the same photo, taken with the screen perfectly readable and glare-free, as if the light in the room had never caused a reflection.
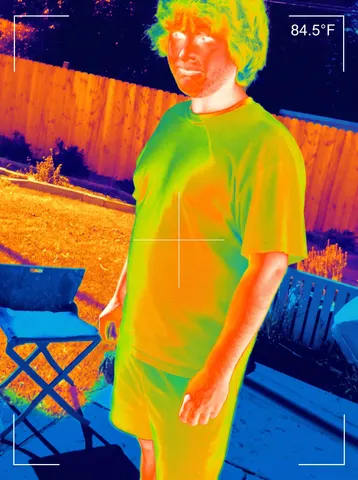
Turn this uploaded photo into an authentic thermal-imaging camera capture, as if viewed live through a handheld thermal scope. Recolor the entire scene using a rainbow thermal heat-map palette: deep blue and purple for the coolest surfaces like sky, shaded fence, and grass, shifting through green and yellow for mid-temperature surfaces, and bright orange to white-hot for the warmest areas, especially exposed skin on the face, neck, and hands.

Preserve this person's exact pose, proportions, composition, and framing from the original photo — only replace the color information with the thermal heat-map palette and add thermal-viewfinder graphic chrome. Keep the image crisp and clean; do not add soft grain, film noise, light leaks, or blur — thermal footage should read sharp and digital, not degraded.

Add authentic thermal-camera HUD elements: a small temperature readout in Fahrenheit in the top-right corner, a thin crosshair reticle centered on the person, and thin white viewfinder corner brackets framing the shot like a real handheld thermal scope display. Do not include any real brand names, logos, or manufacturer markings anywhere in the overlay. The final result should look like an authentic frame captured through a real handheld thermal-imaging camera.